Creating Devices in the Support Tool Device Tab
The Support Tool has a Device tab, which allows you to declare ethernet and serial devices, and once linked to your macro file, allows you to include them in your macros. This post will go over the Device tab, and how to create/open Device files that your macros can use to send commands to them.
Creating a Device File
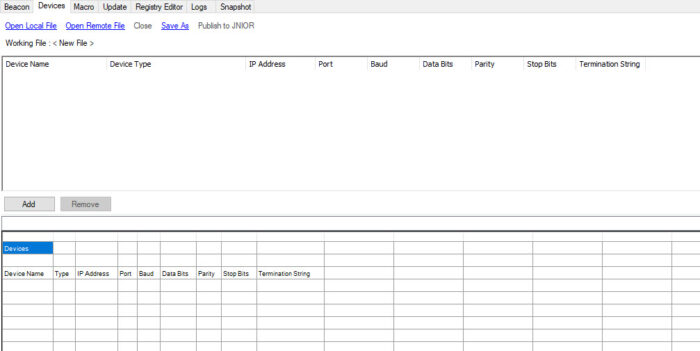
Once on the Device tab, you should see an empty window, with columns representing the different data that can be filled out for each device. At the bottom of the Device tab should be an empty table. The Device and Macros files that are created from these tabs are CSV (comma separated values) files. The table at the bottom reflects the devices you create in the window above it. To add a new device, you can select the Add button at the bottom left of the empty window. Once the device is added you can define the following settings for each device:
- Device Name – Name of device that will be used when referencing it in the Macro file. NOTE: Cannot contain spaces.
- Device Type – Contains predefined devices that can be sent to from the JNIOR. Selecting a predefined device will populate other device settings for you for easier setup. If the device you are using isn’t listed, that’s okay! You can define a general device type yourself by using a Raw Ethernet, Raw UDP, or Raw Serial device depending on the type of connection you need to use to communicate to the device.
- IP Address – For Ethernet or UDP devices only. Enter the IP Address of the device you are trying to communicate with here.
- Port – Changes depending on if its a Ethernet/UDP device versus a Serial Device. If its a Ethernet or UDP device, enter the Port Number of the device you are trying to communicate with here. If its a Serial Device, select which Serial port on the JNIOR you are using. (We recommend using the AUX port. You can use the RS-232/COM port, but this is typically used for diagnostic and debugging use. If you’re not using the AUX port, you’ll need to disable the boot dialog for the RS-232/COM port to send data out of it. )
- Baud – For Serial devices only. Enter the Baud Rate for the Serial device you are using.
- Data Bits – For Serial devices only. Enter the Data Bits for the Serial device you are using.
- Parity – For Serial devices only. Enter the Parity for the Serial device you are using.
- Stop Bits – For Serial devices only. Enter the Stop Bits for the Serial device you are using.
- Termination String – This is optional, and should be used if your device expects a termination string at the end of each command it receives.
Once you’ve filled out your Device’s settings. You then need to save and publish your Device file. Right under the Support Tool tabs at the top of the Device tab, you’ll want to select the Save As button. This will open your file explorer, and you need to save this file anywhere inside the files folder of your Support Tool Directory (This is where the file explorer should automatically open to, so you can save right where the file explorer opens to.)
Once the file is saved on your computer, you’ll then need to publish the file you save to the JNIOR. Right next to the Save As button is the Publish to JNIOR button. This will bring up a JNIOR selection screen, where you can select any JNIOR appearing in Beacon to publish to. Once the JNIORs have been published to, the device file should now be loaded onto the JNIOR, and can be linked to a JNIOR macro file.
Opening a Device File
Instead of creating a Device file, you can open one that has already been created and saved. Selecting the Open Local File button will open your file explorer to where Device files are saved on your PC. Here you can select one you wish to open, and it will populate into the Support Tool Device tab. You can also select the Open Remote File button, which will open a JNIOR selection screen and allow you to open a Device file that is loaded on a JNIOR.